Appearance
KartaDashcam Installation Guide
(Quickstart)
1. Before installation
1.1 Install tools
KartaDashcam empowers the in-car ecosystem with the best-in-class hardware and software platforms. With powerful edge AI capability, KartaDashcam offers multiple features like always-on loop recording (that could be used as proof of any claim, incidents, and accidents), for both driver and passenger, SOS emergency service, and low-cost map data extraction based on audio/video stream. Fleet administrators can also benefit from 24-hour footage recording to significantly improve fleet management efficiency and save operation costs. Numbers 1, 2, 3, 5, and 11 are mandatory accessories, and the others are optional and will vary depending on the deployment requirements of each country.
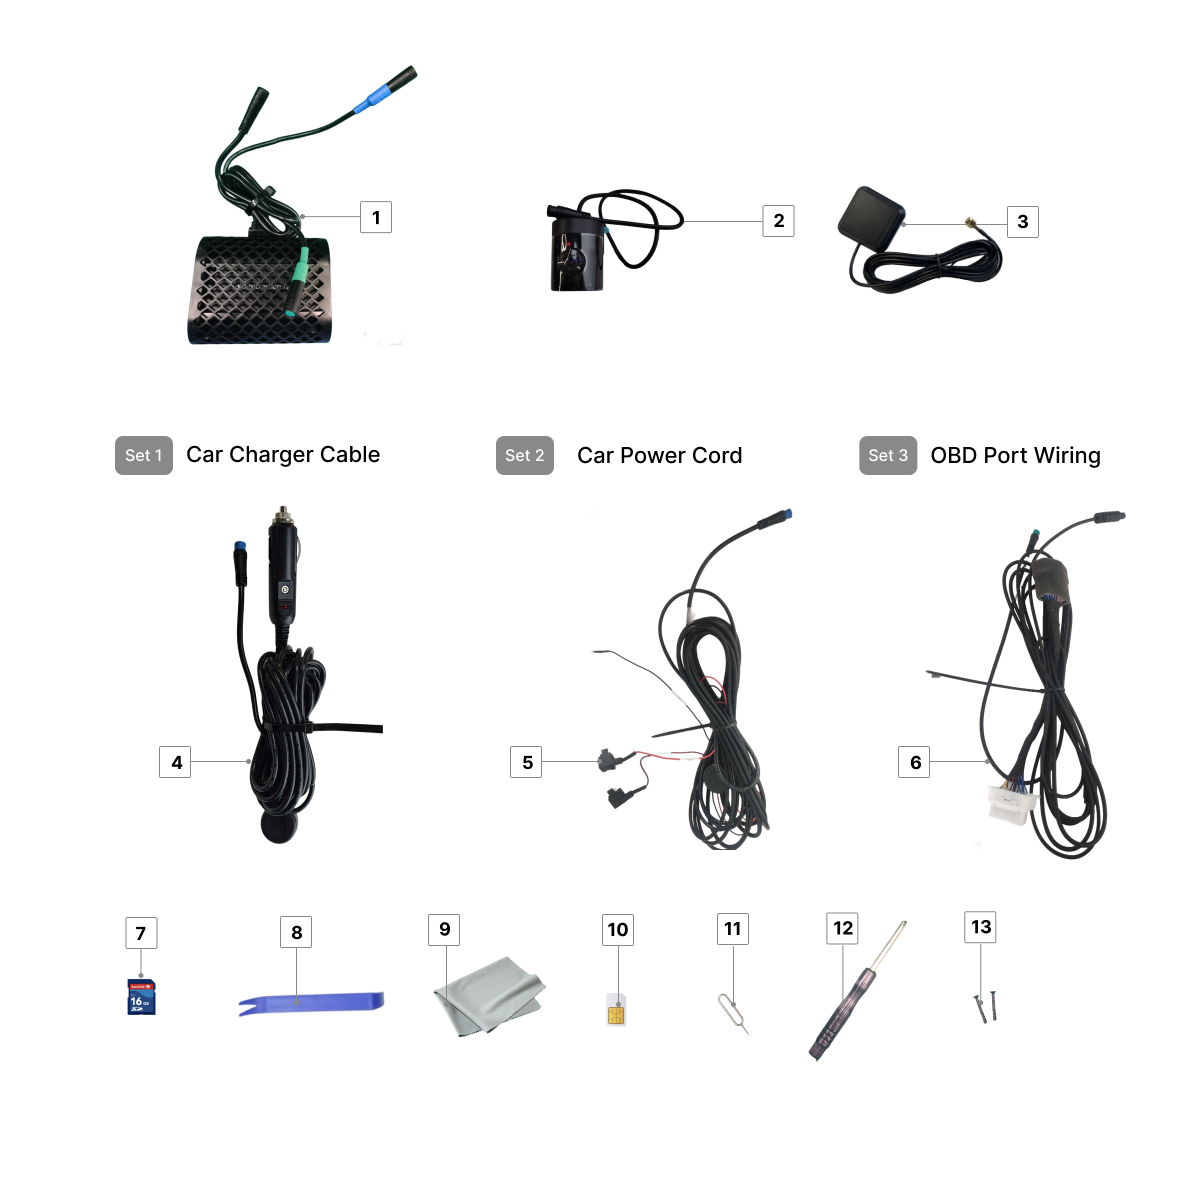
| Item # | Description | Qty | Note |
|---|---|---|---|
| 1 | KartaDashcam with cable | 1 | |
| 2 | Inward camera | 1 | |
| 3 | External GPS antenna | 1 | |
| 4 | Car charger cable | 1 | Choose between 4 and 5 |
| 5 | Car power cable | 1 | Choose between 4 and 5 |
| 6 | OBD port cable (with Immobilizer function) | 1 | Additional option |
| 7 | SD card | 1 | Additional option |
| 8 | Pry bar | 1 | No longer shipping |
| 9 | Microfiber cleaning cloth | 1 | No longer shipping |
| 10 | SIM card | 1 | Bring Your Own |
| 11 | SIM card slot pin | 1 | |
| 12 | Screwdriver | 1 | |
| 13 | Screws | 2 |
1.2 Insert SIM card
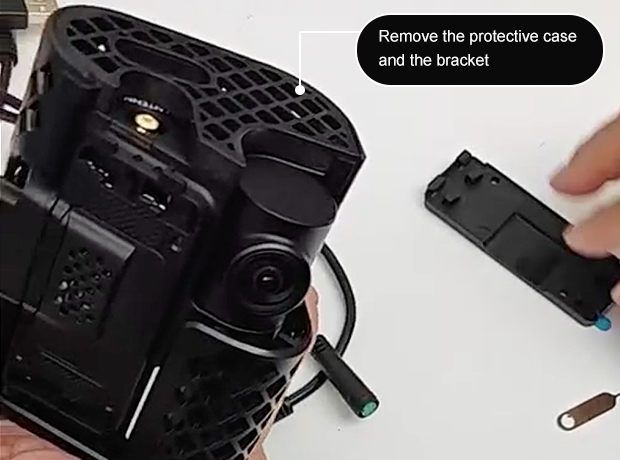
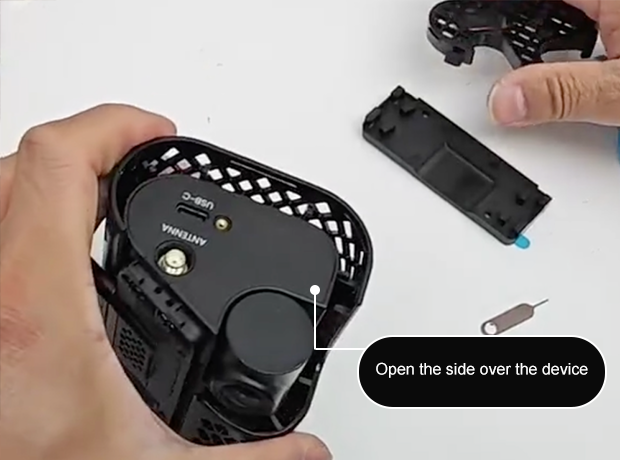
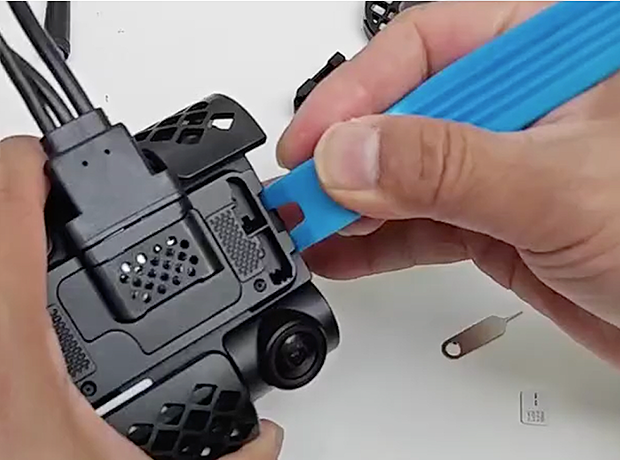
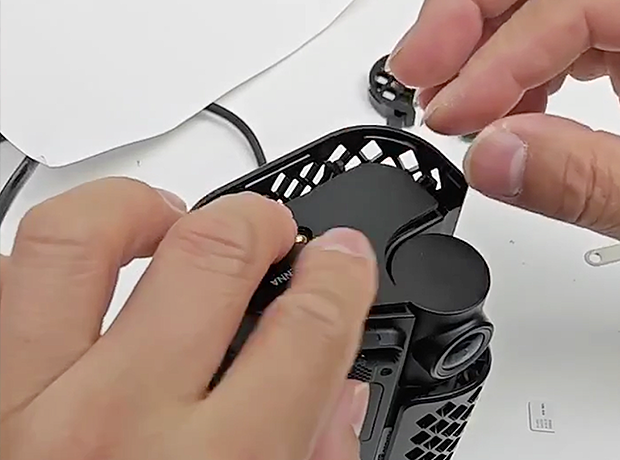
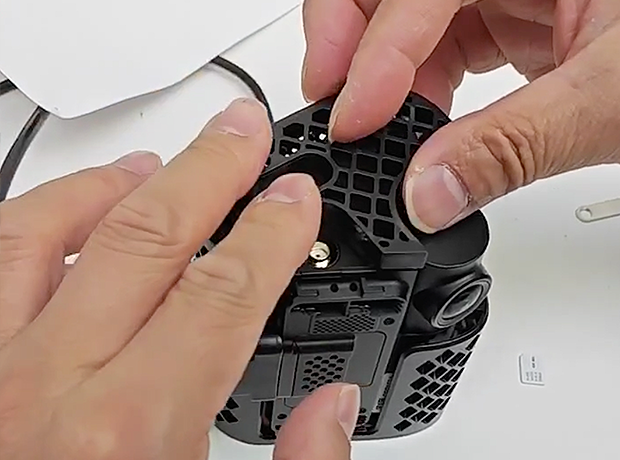
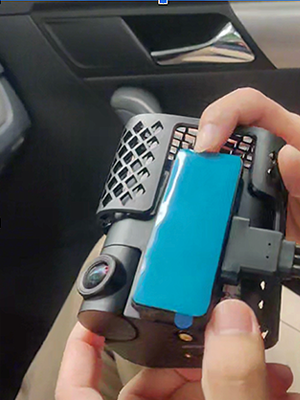
Step 1: First, remove the protective case and the bracket. Then, open the side over the device.
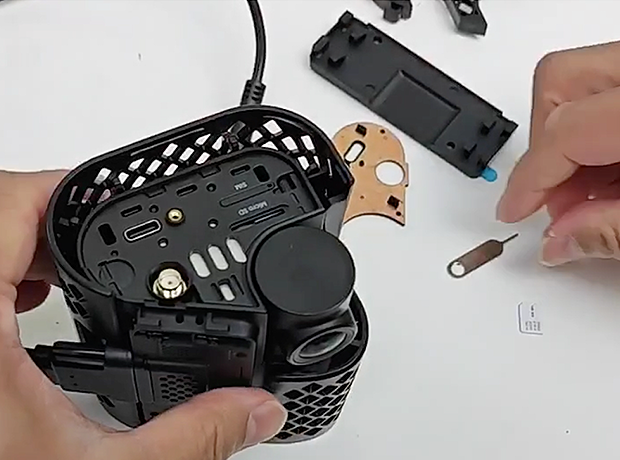
Step 2: Use the pin to open the SIM card tray.

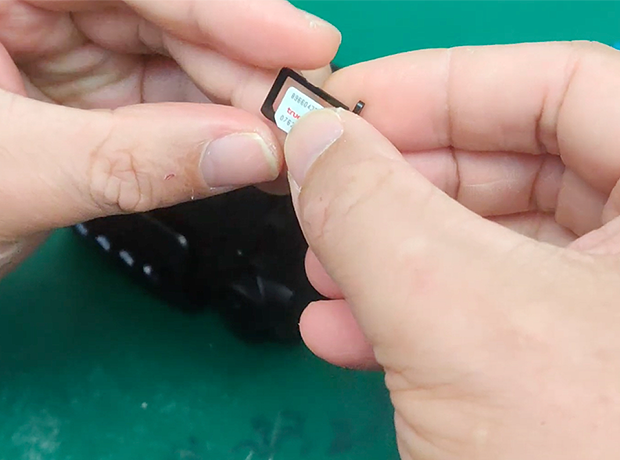
Step 3: Insert the SIM card.
Important:
Activate the SIM card before installation and make sure the data plan fulfills the minimal data usage of 5GB/month.
Tips:
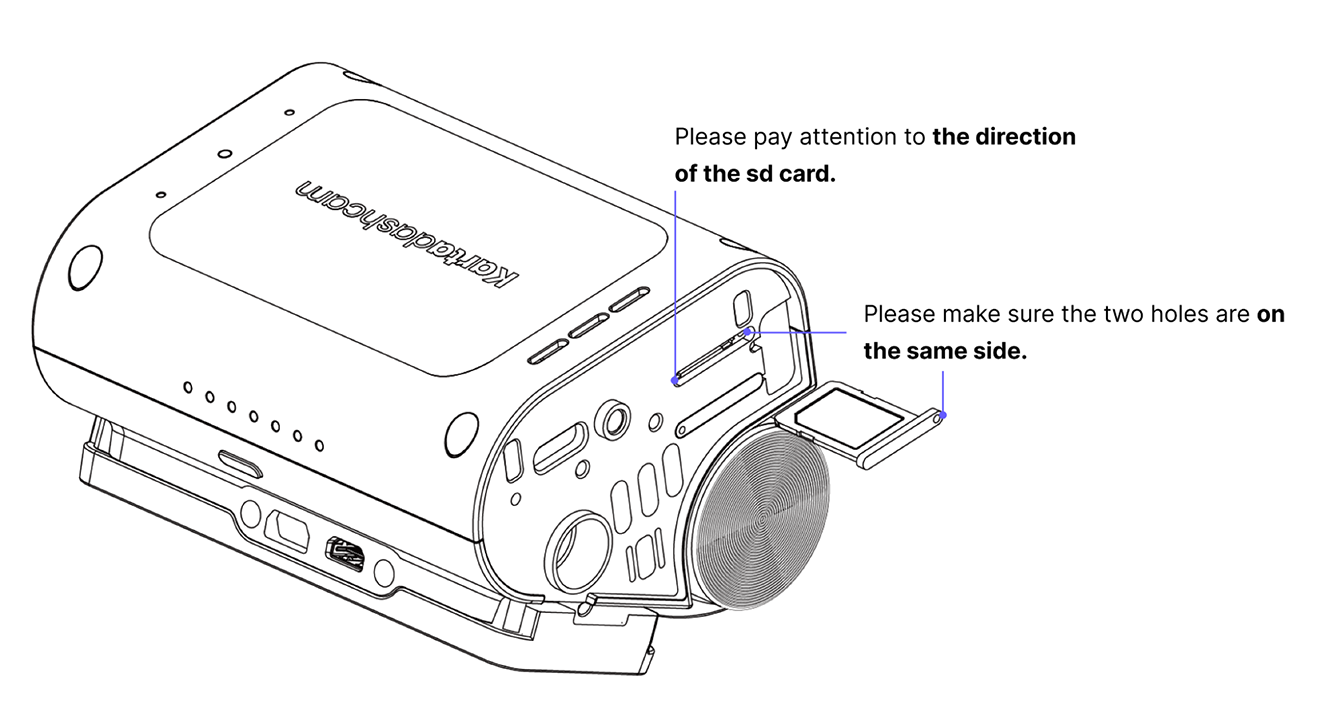
- Make sure it’s the SIM card tray instead of the SD card tray
- When inserting the card, make sure the card is facing the right direction (pay attention to the sign on the slot)
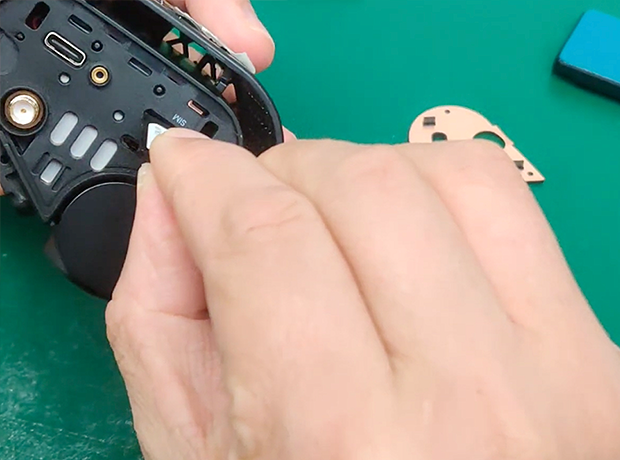
- Make sure the SIM card is inserted back in the slot before starting installation in the car
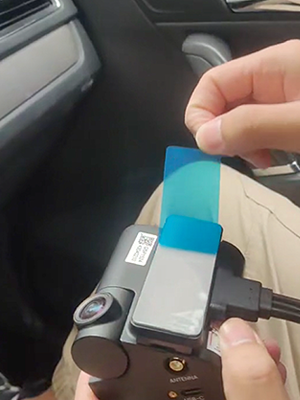
Step 4: After the card is inserted, put the cover back on.
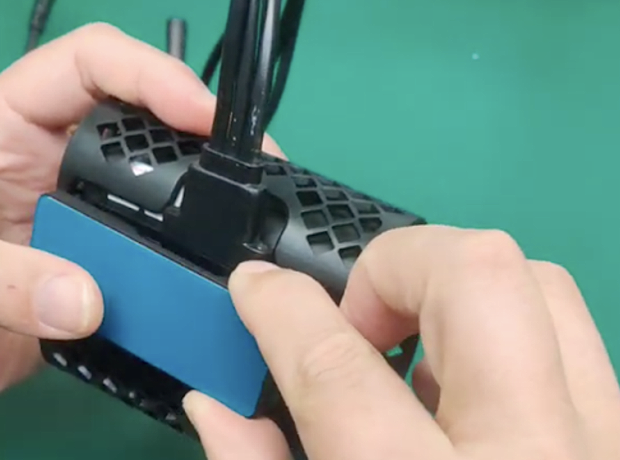
Step 5: Finally, reinstall the KDC protective case and the bracket.
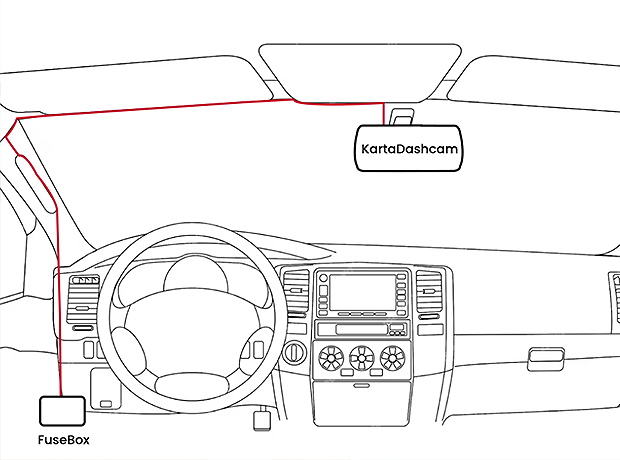
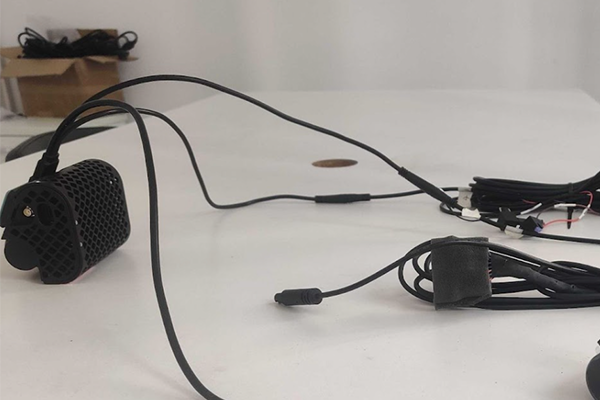
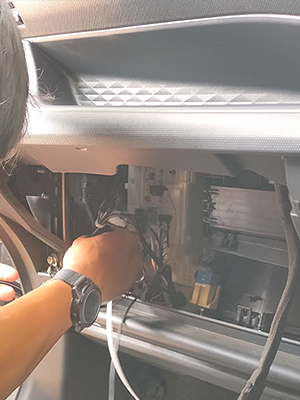
1.3 How to install wiring
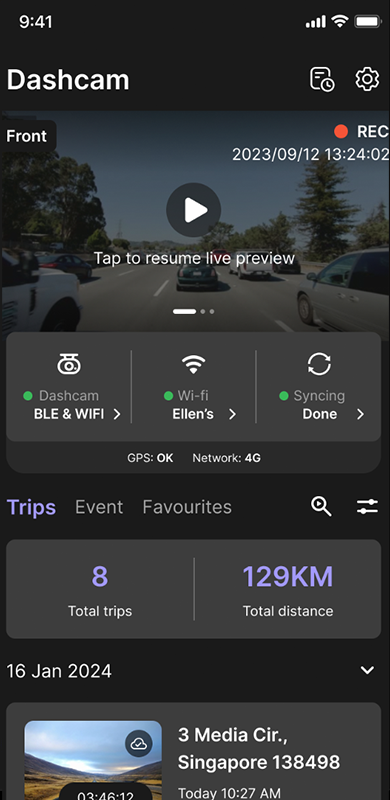
1.4 Install the KartaDashcam app
If you haven’t done so, install the KartaDashcam app from the Google Store:

Currently, the app only supports Android versions.
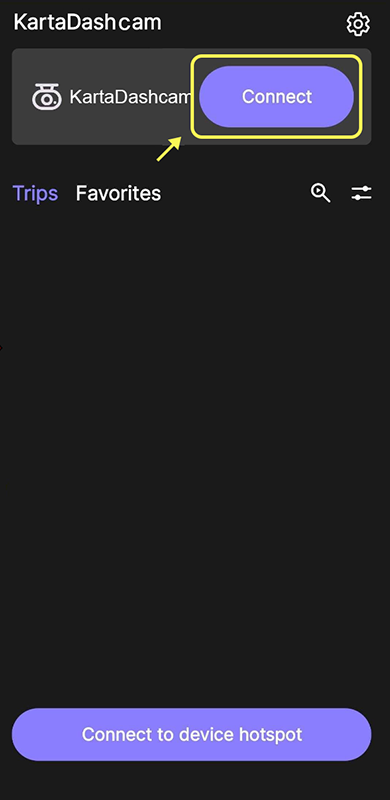
Step 1: Click “Connect” to pair the app with the camera.
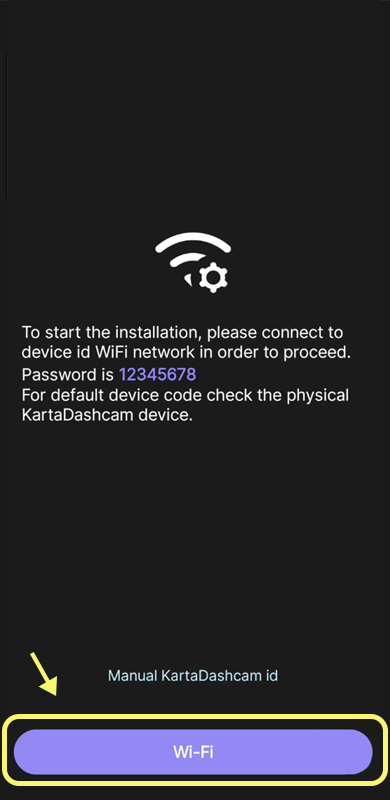
Step 2: Click “Wifi” after the camera connects with the power supply and the green LED is on. Ensure that the Wi-Fi on the phone is turned on.
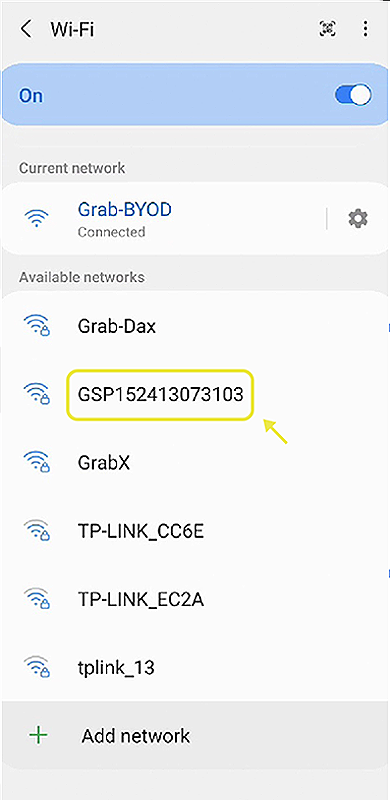
Step 3: Connect the KartaDashcam to the hotspot that starts with "GSP" (the hotspot corresponds to the KDC device ID).
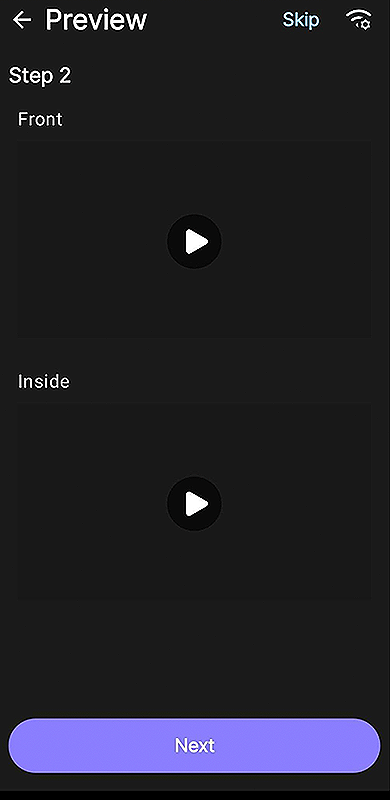
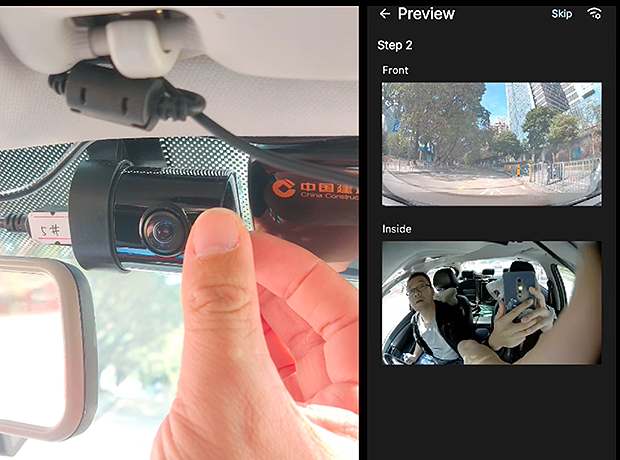
Step 4: After linking the device, you can view the preview of the installation line reference.

If there is no content in the preview, please click the Wi-Fi connection on the right. You can preview it at the top of the app or view the history by date below.
2. Installation Steps
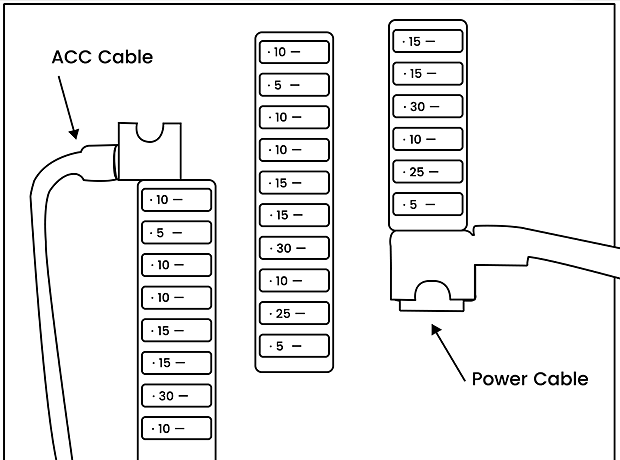
How to find correct fuse (YouTube video)
When the car is turned off, the fuse still has power, which means that the fuse is always powered. This fuse can be connected to the KDC Power cable.When the car is turned off, the fuse has no power. After starting the car, the fuse has power. This fuse can be connected to the KDC ACC cable.
How to find GND Point (YouTube video)
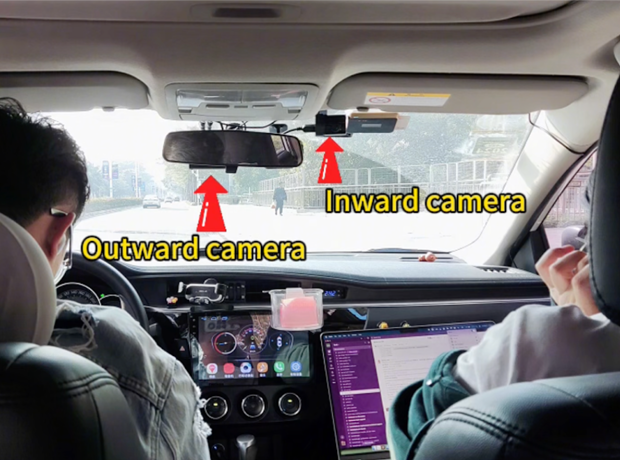
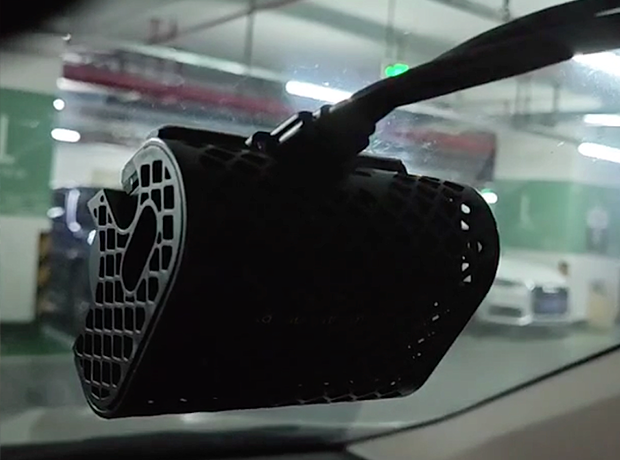
2.1 How to determine where to install
Recommended location (Inward camera on the driver's side)
- Install the device near the center
- Ensure it'll not block the driver's view
- Ensure the outward camera is within range of the wiper
- Install at the highest point possible
Use the alcohol spray and lens cloth to wipe selected areas of the glass.
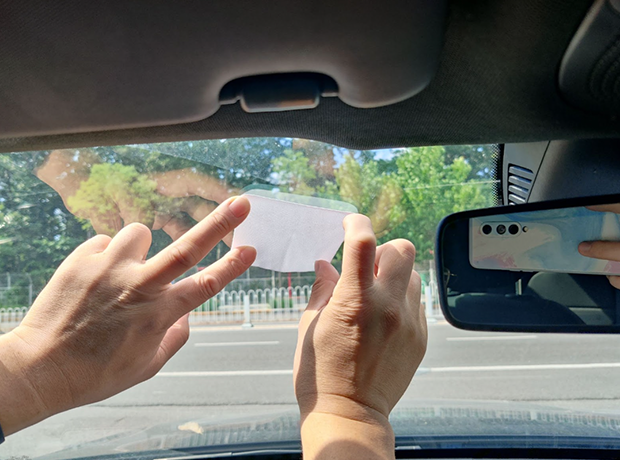
Remove the machine from the protective case. Peel off the 3M adhesive sticker cover on the device.
Tips:
You need to press for 25 seconds after sticking it to ensure complete installation. Don’t peel it off completely as you may need to adjust the camera position. It would be difficult to adjust the camera if it’s fully attached to the glass.
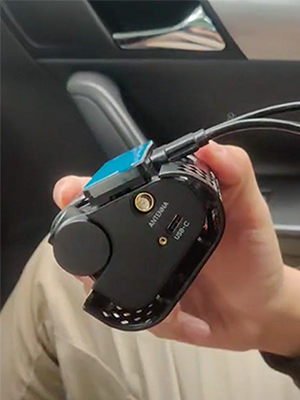
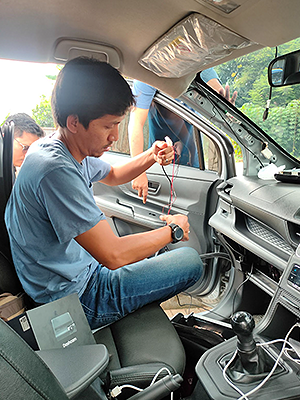
2.2 Wiring steps
Connect the KartaDashcam to a power supply (car power cord) with the correct cable. Start the car and ensure the dashcam's LED turns green.
[Option 1] Get power from the car battery In terms of installation, using a car battery is the most difficult and time-consuming. You have to connect 3 types of cables to the battery source: acc, ground, and standby, and the installation takes 15 minutes. The camera will still be on when the car is off because there is electrical energy from the standby cable.
Wiring schematic diagram
[Option 2] Get power from the car charger port
Connect the dashcam to the car charger port. Availability of the charger port in cars is rare, especially for new vehicles.
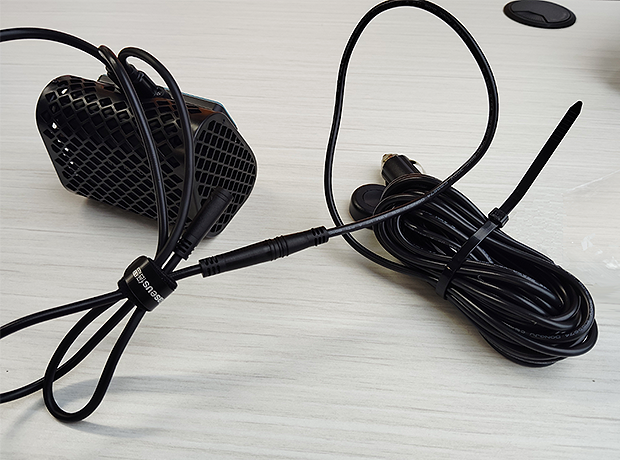
When plugged in, a red light will appear at first, which means the device is starting. After a few seconds, it will turn green, which means it starts normally.
2.3 Installation Check
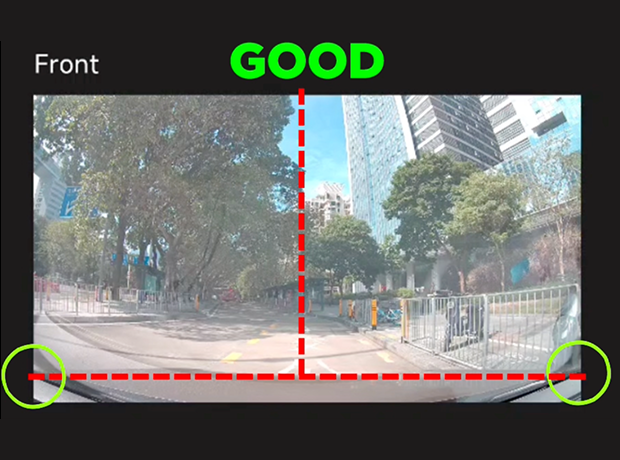
Outward camera angle check

Installed correctly
Installed error

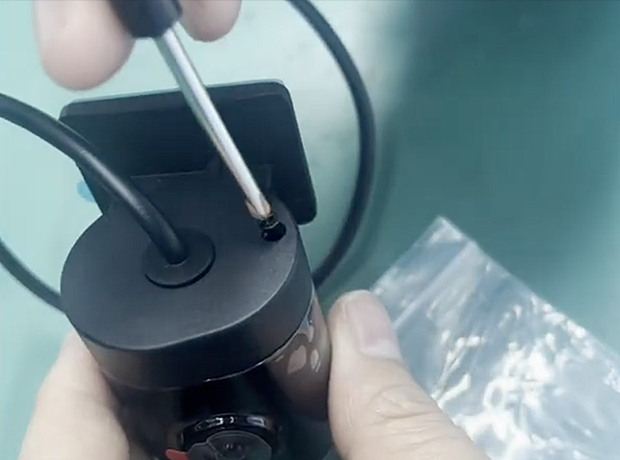
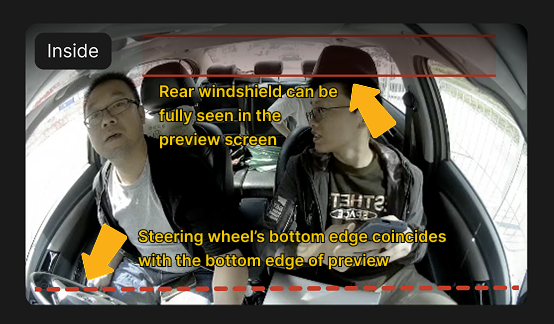
Inward camera angle calibration
After adjusting the angle lock the screw to prevent loosening
Installed correctly
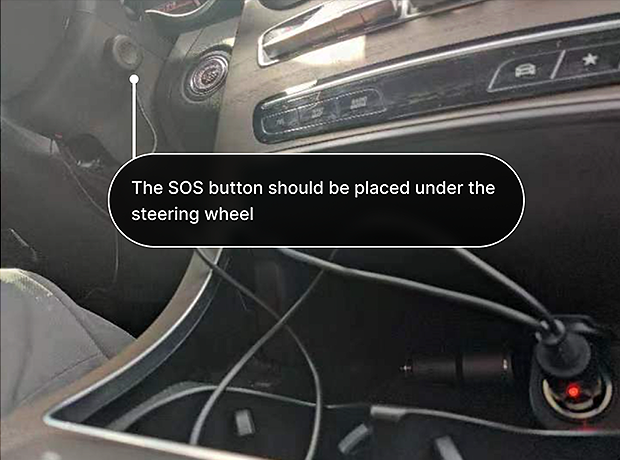
Install the SOS button. Place the SOS button under the steering wheel, and check the device's red light flashes for about 10 to 13 seconds.

Test ACC sleep and wake function
FAQ
Q. What if the dashcam turns off suddenly?
A. Most likely it is related to the power connectors. Make sure the power connectors are installed correctly (both the connector to the car and the connector to the dashcam).
Q. What does it mean when the red LED indicator is blinking?
A. The indicator LED will blink red if the SOS button has been pressed and will return to green after a few minutes.
Q. Why am I having difficulty installing the applications on my smartphone?
A. This is usually related to the availability of phone storage space. Make sure your phone has enough free space when installing.
Q. Why is the device LED always red after power supply?
A. If no SIM card is inserted, the red LED on the dashcam will light to alert the user to check the SIM card. This could indicate either a missing SIM card or an issue with the SIM card inserted.
Q. What types of mobile phones does the KDC App currently support?
A. Most Android phones on the market can install the KDC App, so please feel free to use it.
Q. What should I do if an error message appears while using the KDC App?
A. Using KDC requires Bluetooth and Wi-Fi. Bluetooth gets device info, Wi-Fi fetches current trip data. If errors occur, try reconnecting Wi-Fi.
Q. What should I do if the KDC Bluetooth connection fails continuously?
A. If the Bluetooth connection fails, we suggest you skip it and try to connect to Wi-Fi to watch a trip or real-time video.
Q. I inserted one M2M SIM card, but it can't be connected to the network successfully?
A. For the majority of M2M SIM cards, a special APN should be configured. You can do APN settings in the KDC APP for each device.
Disclaimer
The information in this user manual is for general reference only. While we strive to be accurate, we do not guarantee the timeliness, reliability, or applicability of the information. Any reliance on this manual is at your own risk.
This manual may contain links to external websites that Grab does not control. We are not responsible for the content or availability of these websites and do not endorse any views expressed therein.
We strive to keep the manual available and up to date, but Grab is not responsible for any temporary unavailability caused by technical issues beyond our control.